
Control your Tinxy Smart Switches From Anywhere With Official REST APIs from Tinxy
In this article, I’ll explain how to control Tinxy Smart Switches from Command-Line / Terminal with the help of official REST APIs from Tinxy.
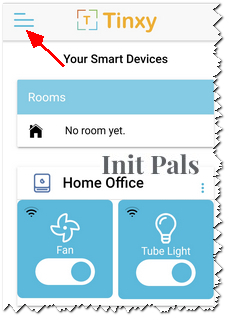
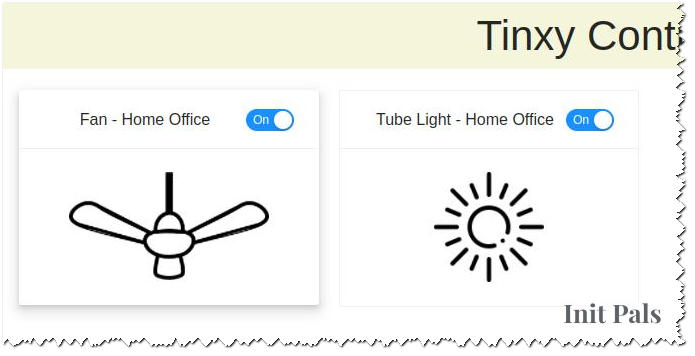
I have been using a Tinxy Smart Switch device to control a Fan and a Tube Light in my Home Office and using their mobile app for managing that device. Since I would be in front of My Laptop for most of my time, I thought of having a Web Application to manage the Tinxy Smart Switch.
So I was looking for details of any available REST API or SDK and found some information in their FAQ/Help section of the Website. There is no official documentation available yet. What you see here is what I have figured out through a PostMan Collection referred in their forum.
API Key for REST APIs
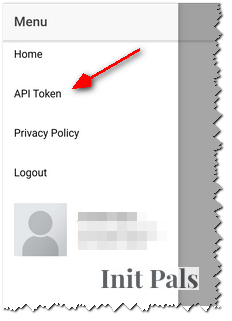
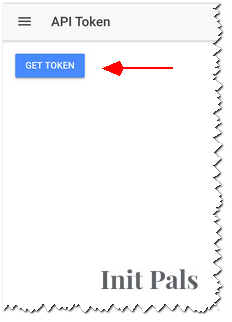
REST APIs of Tinxy requires an API KEY for authorization and, you can create one by following the below steps in the Tinxy mobile app. Copy that API KEY and have it handy as you would require it for all REST API interactions.
REST APIs from Tinxy
At this time of writing, the base URL to access Tinxy REST API is https://backend.tinxy.in/v2.
View All Devices
Now, let us see how to interact with their API. The endpoint to view all your registered devices is “https://backend.tinxy.in/v2/devices/“. The below curl request appended with the API key returns the list of registered Tinxy devices.
curl -H "Authorization: Bearer [API_KEY]" \
https://backend.tinxy.in/v2/devices/
The above command would return an output similar to the one shown below.
[
    {
        "enabled": true,
        "devices": [
            "Fan",
            "Tube Light"
        ],
        "deviceTypes": [
            "Fan",
            "Tubelight"
        ],
        "notificationOn": false,
        "firmwareVersion": 42,
        "_id": [removed],
        "userId": [removed],
        "switchType": "SWITCH",
        "name": "Home Office",
        "toggleDelay": 250,
        "registrationDate": [removed],
        "mqttPassword": [removed],
        "pairingCode": [removed],
        "typeId": {
            "primary": true,
            "numberOfRelays": 2,
            "toggleDelay": 0,
            "traits": [
                "action.devices.traits.OnOff"
            ],
            "_id": [removed],
            "name": "WIFI_2SWITCH_V1",
            "__v": 0,
            "gtype": "action.devices.types.SWITCH"
        },
        "uuidRef": [removed],
        "__v": 1
    }
]
View & Toggle Device State
The value of the key “_id” (line 14) is the device id of the switch and, individual nodes are identified by its item index listed under the “devices” key (line 4). The index of the device nodes starts with 1. Append both “_id” and “node index” to the URL as shown below to find its current state.
“https://backend.tinxy.in/v2/devices/[value of _id key]/state?deviceNumber=[index of device]”
Code Snippet
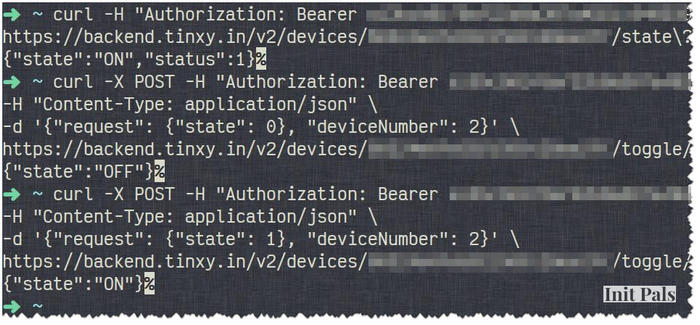
Execute the below code snippet in the terminal after replacing [API_KEY] and [_id] to get the details of your devices and also to interact with your devices.
# View the status of the node
~curl -H "Authorization: Bearer [API_KEY]" \
https://backend.tinxy.in/v2/devices/[_id]/state\?deviceNumber\=2

# Output
{"state":"ON","status":1}

# Switch Off the Node
curl -X POST -H "Authorization: Bearer [API_KEY]" \
-H "Content-Type: application/json" \
-d '{"request": {"state": 0}, "deviceNumber": 2}' \
https://backend.tinxy.in/v2/devices/[_id]/toggle/

# Output
{"state":"OFF"}

# Switch On the Node
curl -X POST -H "Authorization: Bearer [API_KEY]" \
-H "Content-Type: application/json" \
-d '{"request": {"state": 1}, "deviceNumber": 2}' \
https://backend.tinxy.in/v2/devices/[_id]/toggle/

# Output
{"state":"ON"}
Web Application For Tinxy Smart Switch
With the official API, Tinxy Switches can also be connected with Home Assistant Application. Instead, I am creating a lightweight React JS application that I can run as a Docker Container in my Synology NAS. I will cover that part in one of my next articles. Below is a quick sneak-peek of the UI of the application that I am creating to manage Tinxy devices.
Leave a comment